There's a certain magic that happens when simple ingredients transform into something truly extraordinary. For many, that magic takes the form of old-fashioned peanut brittle – a delightful confection that strikes the perfect balance between sweet and salty, delivering an irresistible candy crunch with every bite. It's the kind of treat that evokes nostalgia, perhaps conjuring memories of grandparents' kitchens, holiday gatherings, or even the subtle crunch enjoyed during a quiet evening with loved ones. While mass-produced versions exist, nothing quite compares to the homemade perfection of a fresh batch. This comprehensive guide will walk you through an easy and reliable peanut brittle recipe, ensuring your creation wows everyone, every time.
The Magic Behind Perfect Peanut Brittle: Why Homemade is Best
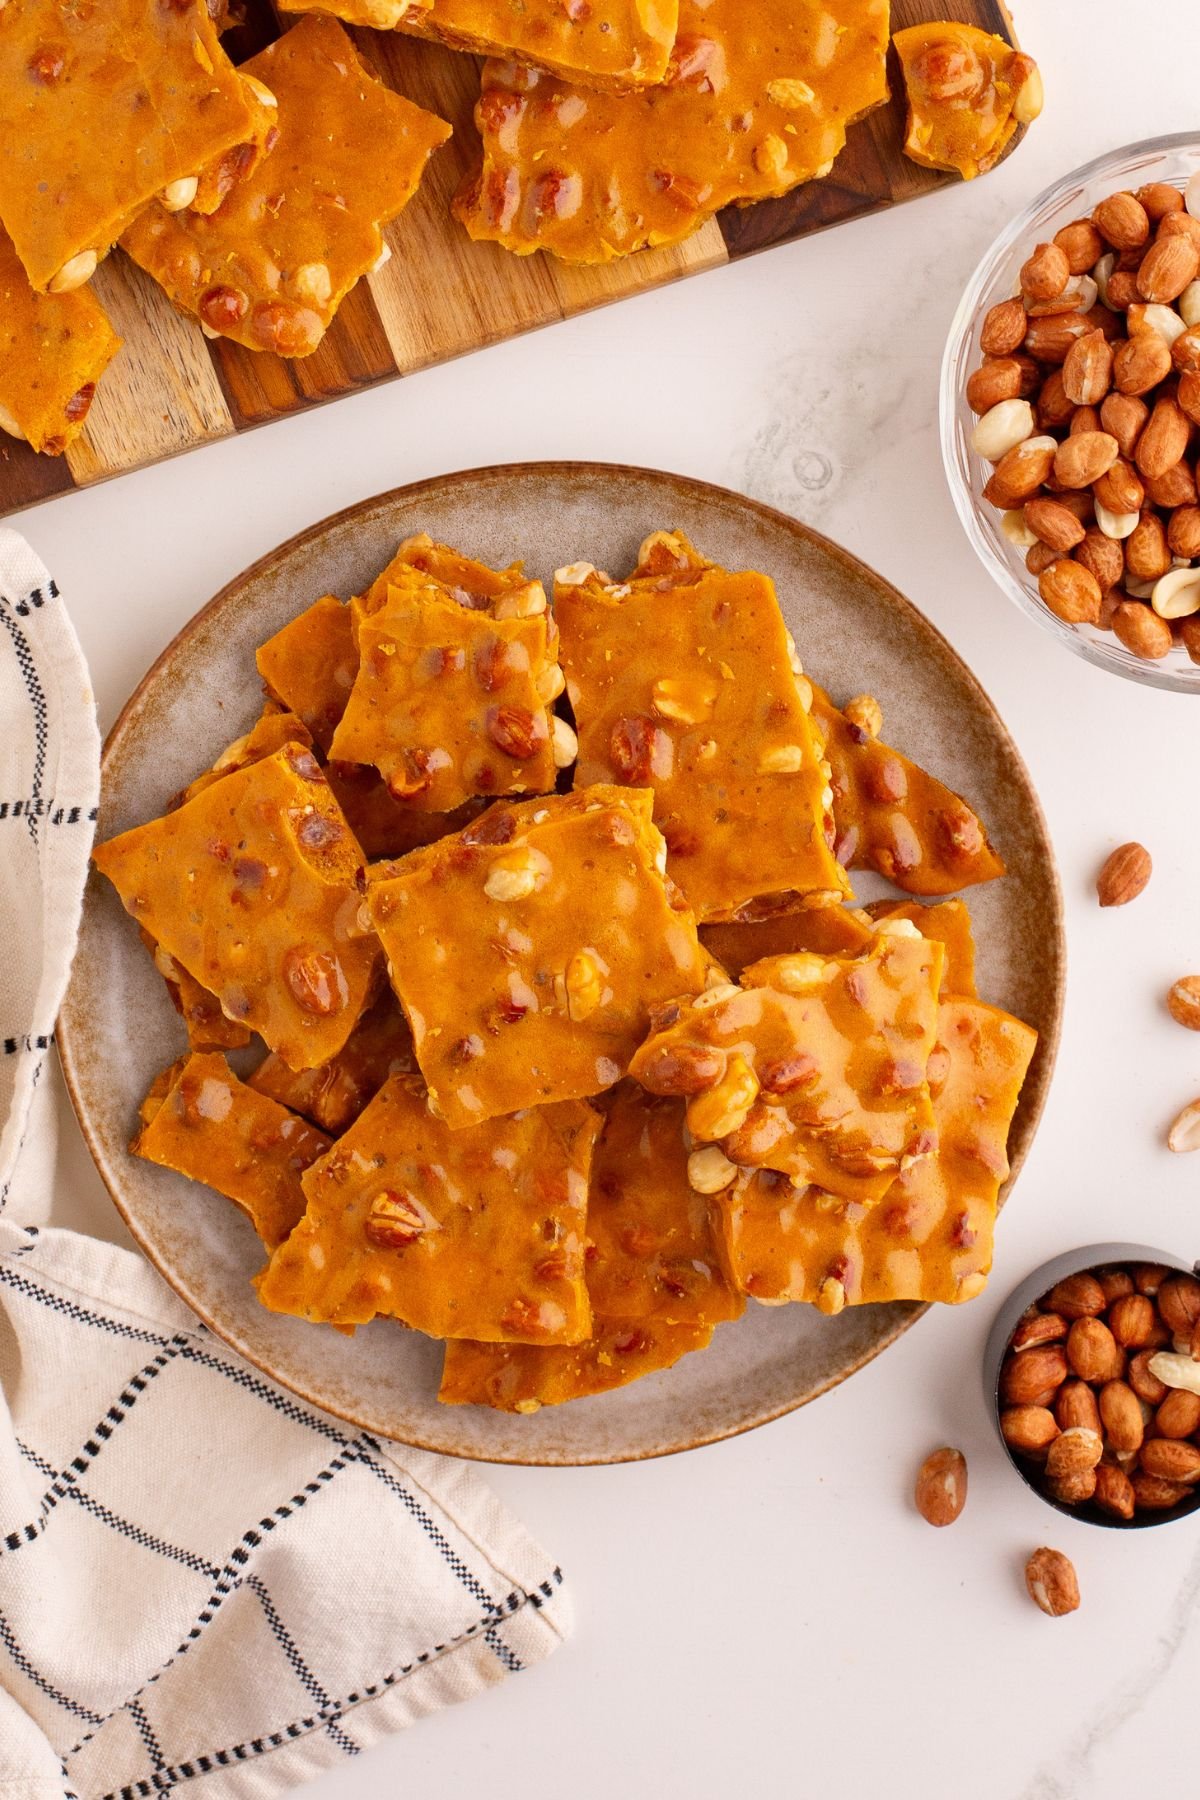
The allure of homemade peanut brittle lies in its unparalleled sensory experience. Imagine that first delicate snap as you break off a piece, followed by the satisfying crunch as it melts in your mouth, revealing layers of caramelized sugar, roasted peanuts, and a subtle hint of salt. This intricate dance of textures and flavors is what makes peanut brittle a timeless classic. Unlike its store-bought counterparts, homemade brittle offers a freshness and depth of flavor that simply can't be replicated. You have control over the quality of ingredients, the level of roast on your peanuts, and that perfect, airy crispness that defines truly great brittle.
Beyond the taste, there's the undeniable charm of a treat made with love. It's a fantastic candidate for holiday gifts, capable of eliciting genuine smiles and appreciation. A beautifully packaged tin of your homemade creation is far more personal and memorable than anything bought off a shelf. The secret to its enduring popularity isn't just its deliciousness; it's also surprisingly straightforward to make, provided you follow a few key principles. This old-fashioned peanut brittle recipe isn't just about combining ingredients; it's about mastering a technique that rewards precision with spectacular results. By embracing the process, you unlock the ability to create a treat that truly stands apart, proving that some classics are indeed best when crafted right in your own kitchen.
Gathering Your Essentials: Ingredients for the Best Peanut Brittle
Crafting the best peanut brittle begins with understanding the role each ingredient plays in achieving that coveted texture and flavor. You'll likely find most of these staples already in your pantry, but a quick check ensures you're ready to go. Remember, for optimal results, measure everything out and have it ready before you even turn on the stove – a crucial tip that will save you from frantic scrambling later!
- Granulated White Sugar: This is the backbone of your brittle, providing the essential sweetness and caramelization.
- Light Corn Syrup: A non-negotiable ingredient! Corn syrup is vital for preventing the sugar from crystallizing, ensuring your brittle has a smooth, creamy texture rather than a grainy one. It helps maintain the sugar's liquid state during cooking.
- Water: Water assists in dissolving the sugar completely at the initial stage, allowing for an even caramelization later on.
- Salt: A pinch of salt is absolutely essential to balance and enhance the intense sweetness. It truly makes the flavors pop. If you opt for salted butter later, you can reduce or omit this initial salt.
- Peanuts: The star of the show! For a rich, dark, and deeply flavorful brittle, many enthusiasts, including culinary producer Nicole McLaughlin (a.k.a. NicoleMcMom), recommend using raw peanuts with their skins on. Roasting them during the candy-making process imparts a superior flavor compared to pre-roasted nuts.
- Unsalted Butter: Butter adds a luxurious richness and a touch of fat that makes the brittle even more decadent. Using unsalted butter gives you precise control over the overall salt content of your recipe.
- Baking Soda: The magic ingredient that gives brittle its characteristic airy, delicate crunch! When added to the hot sugar mixture, baking soda reacts, releasing tiny carbon dioxide bubbles. These bubbles get trapped within the cooling candy, creating those desirable small pockets of air that make the brittle light and tender, rather than rock-hard.
Having these ingredients prepped and ready reflects the wisdom of seasoned candy makers: "There's no time for dilly-dallying" once the cooking process begins. This simple act of preparation sets you up for success, allowing you to react quickly and precisely at each critical stage.
Mastering the Process: A Step-by-Step Guide to Your Peanut Brittle Recipe
Making peanut brittle is a dance between heat, timing, and quick action. While it may seem intimidating, with proper preparation and a good understanding of the steps, you'll achieve homemade perfection every time. Here’s how to bring this classic peanut brittle recipe to life:
Essential Equipment:
- A heavy-bottomed saucepan (at least 3-4 quarts)
- A reliable candy thermometer (highly recommended for precision)
- A large, heat-resistant baking sheet lined with a silicone mat or parchment paper, lightly greased.
- Wooden spoon or heat-resistant spatula
The Step-by-Step Method:
- Prepare Your Workspace: Before you do anything else, measure out all your ingredients and have them within arm's reach. Line your baking sheet and grease it. This setup is crucial, as the cooking process moves very quickly.
- Initial Syrup Creation: In your heavy-bottomed saucepan, combine the sugar, light corn syrup, and water. Stir these ingredients over medium heat until the sugar is completely dissolved. Continue to heat the mixture, bringing it to a rolling boil.
- Add Peanuts & Monitor Temperature: Once boiling, stir in your peanuts. At this point, carefully attach your candy thermometer to the side of the pan, ensuring the bulb is submerged in the syrup but not touching the bottom. Continue to cook, stirring occasionally to prevent sticking, until the mixture reaches precisely 300°F (149°C). This is the "hard crack" stage, essential for brittle's crunch. If you don't have a thermometer, you can test by dropping a small amount of syrup into a bowl of cold water. If it forms hard, brittle threads that snap easily, it's ready.
- Remove from Heat & Incorporate Final Ingredients: Immediately remove the saucepan from the heat once 300°F is reached. Quickly stir in the butter until it's fully melted and incorporated. Then, add the baking soda, stirring vigorously. You'll notice the mixture becoming foamy and lighter in color as the baking soda creates air bubbles – this is exactly what you want for an airy, tender brittle.
- Pour and Spread: As soon as the baking soda is fully mixed and the mixture is foamy, pour the hot candy onto your prepared baking sheet. Working quickly, use a greased spatula or the back of a spoon to spread the brittle into a thin, even rectangle. The thinner you spread it, the more delicate and "brittle" it will be. You should see tiny pockets of bubbles around the edges, a sign of its future lightness, as noted by Nicole McLaughlin. For more tips on achieving that perfect texture, refer to our article on Perfect Peanut Brittle: Achieve Crunchy, Airy Texture Easily.
- Cool and Break: Allow the brittle to cool completely at room temperature. This can take anywhere from 30 minutes to an hour, depending on the thickness. Once firm and completely cooled, it will be hard and glassy. Break it into irregular pieces using your hands, or for larger batches, a mallet can be helpful.
And there you have it – your very own batch of easy, old-fashioned peanut brittle, ready to be enjoyed or shared!
Tips for Success & Storing Your Homemade Perfection
While the steps for this peanut brittle recipe are straightforward, a few expert tips can elevate your candy-making experience and ensure consistent success:
Essential Tips for Brittle Brilliance:
- Speed is Your Friend: Once the syrup reaches temperature and you add the butter and baking soda, every second counts. Have everything prepped to ensure you can stir, pour, and spread quickly before the candy sets.
- Don't Rush the Heat: While you need to be quick at the end, don't rush the initial cooking of the sugar syrup. Medium heat allows the sugar to dissolve properly and caramelize evenly without burning.
- Invest in a Good Thermometer: A candy thermometer is truly your best friend for this recipe. Eyeballing the "hard crack" stage can be tricky and lead to undercooked (chewy) or overcooked (burnt) brittle.
- Consider Your Peanuts: As mentioned, raw peanuts with skins yield a richer flavor. If you use pre-roasted peanuts, be mindful that they're already cooked and might darken faster.
- Safety First: Hot sugar is extremely dangerous. Be very careful when stirring and pouring. Keep children and pets away from the stovetop during the cooking process.
Storing Your Homemade Brittle:
Proper storage is key to maintaining the crispness and flavor of your peanut brittle. Its enemies are moisture and air.
- Airtight is Right: Once completely cooled and broken into pieces, store your peanut brittle in an airtight container at room temperature. A cookie tin or a sealed plastic container works perfectly.
- Avoid the Fridge: Do not refrigerate peanut brittle. The moisture in the refrigerator will cause it to soften and become sticky, losing its signature brittle texture.
- Longevity: When stored correctly at room temperature, homemade peanut brittle will last one to two months, though it's often devoured much sooner!
- Freezing for Future Enjoyment: Yes, you can freeze peanut brittle for up to three months! However, be aware that freezing can slightly alter the texture, sometimes making it a bit chewier upon thawing. To freeze, place pieces in zip-top freezer bags or freezer-safe containers, removing as much air as possible. Thaw at room temperature.
Whether you're making a batch for yourself, for a special occasion, or planning to present stunning homemade peanut brittle for gifts, these tips will help you achieve perfection and keep your brittle at its best.
Making homemade peanut brittle is a rewarding experience, transforming simple pantry ingredients into a delightful and impressive confection. This easy old-fashioned peanut brittle recipe provides a clear path to achieving that perfect balance of sweet, salty, and crunchy perfection. By following the steps, understanding the role of each ingredient, and embracing the quick pace required, you'll be able to create a batch that truly wows. So, gather your ingredients, clear your counter, and get ready to enjoy the magic of homemade peanut brittle – a timeless treat that's always a crowd-pleaser and a truly satisfying culinary accomplishment.
